The operating system installed on a computer or laptop, alas, is not eternal, so users periodically face the need to reinstall the system.
The reason may be Windows failure, virus activity, or simply clutter and slow performance. Be that as it may, installing the operating system from a DVD disc is not very convenient.
Why?
- First: you don't always have a blank disc on hand to burn the OS image.
- Second: the installation speed is significantly lower than with installing Windows from a bootable flash drive.
- And third: most modern laptops simply lack DVD drives, and not all computer drives are functional.
Therefore, the ideal option remains installing Windows 7, Windows 8 using a bootable flash drive.
How to create a bootable flash drive?
There are many ways to create a bootable flash drive, but the easiest is to create a bootable flash drive using the UltraISO program.
For example, we will create a bootable Windows 7 flash drive, but in the same way you can burn (burn an ISO image) disk images of other operating systems. To create a bootable flash drive, we need the UltraISO program (download UltraISO program for free in Russian), an operating system image, and a flash drive with a capacity of at least 4 GB. So, launch the installed UltraISO program.
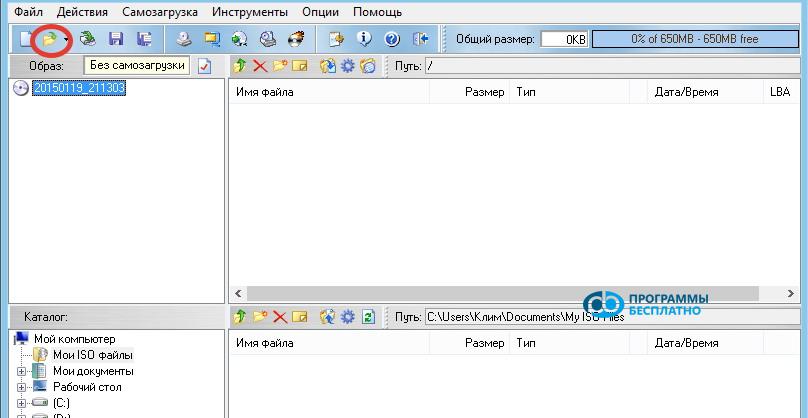
In the window that opens, click on the icon of the "Open" tool:
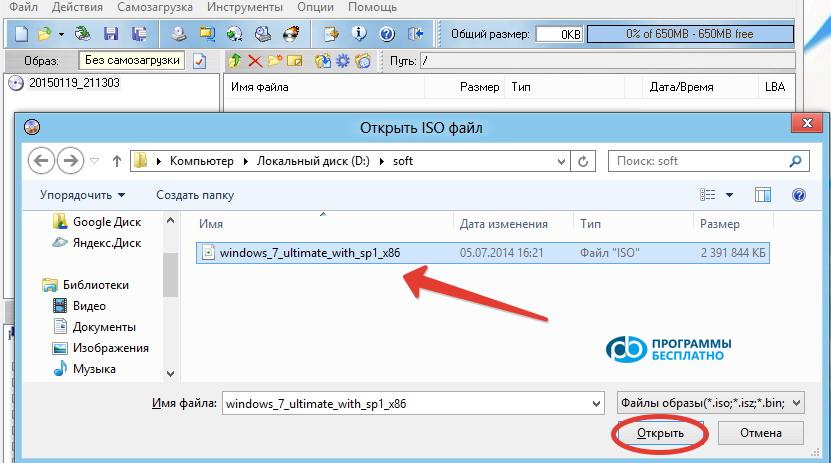
You can also perform this action by clicking on the "File" tab and selecting the "Open" item, or simply by pressing the Ctrl+O key combination. In the explorer window that opens, go to the folder where the prepared Windows 7 image is located, click on it, and press the "Open" button:
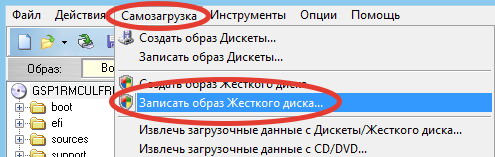
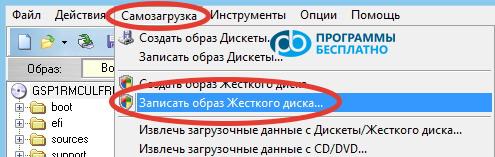
The program will open the image, and all that remains is to burn it. To do this, click on the "Bootable" tab and select the "Write Disk Image..." item:
A new window will open:
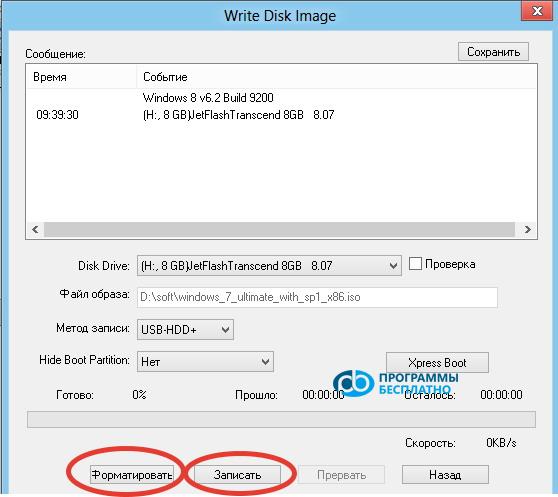
Now it's worth reminding that when creating a bootable flash drive, all information on it will be lost, so save all important data on another medium. It is highly recommended to use a formatted flash drive and the FAT32 file system.
This can be done using standard Windows tools, or you can use the built-in formatting tool of the program.
Preparing the flash drive for writing the image
To format the flash drive in the program, click on the "Format" button. A formatting window will appear indicating the flash drive capacity, the file system to format to, and the flash drive name:
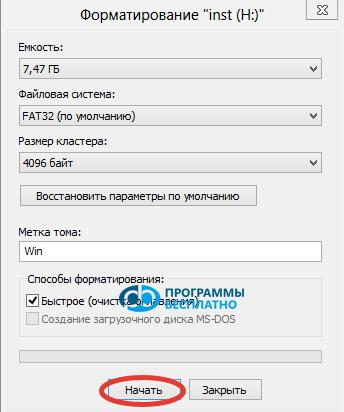
Click on the "Start" button and in the window that appears, confirm the selection by clicking the "OK" button. The formatting process will begin, after which a window will appear:
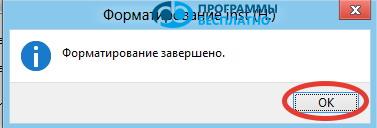
Click the "OK" button and then "Close". The flash drive is ready, and you can proceed directly to creating a bootable flash drive from an ISO image. If your flash drive is already formatted, you can skip the formatting step.
Now click on the "Write" button. The program will warn again that all information on the flash drive will be deleted:
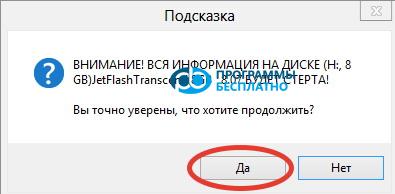
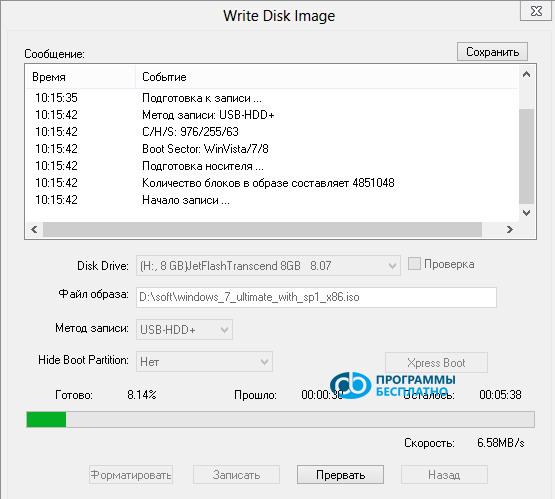
Press the "Yes" button and the writing process starts. In the window, you can see the time elapsed, how much time is left, as well as the writing speed and what percentage is already done:
After a few minutes, the writing will be completed:
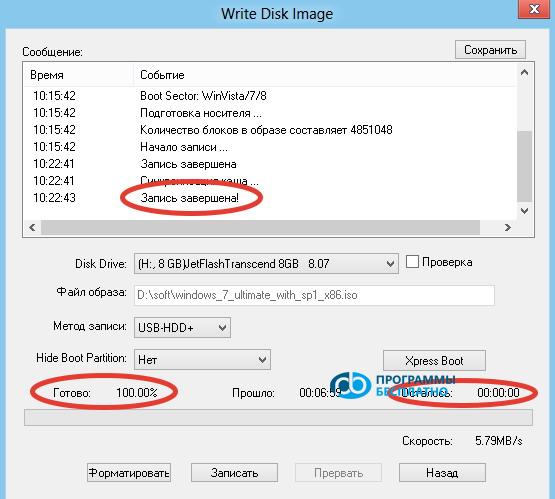
Now the bootable flash drive is created and ready to use, and you can close the UltraISO program.