In this article, we will tell you how to split a hard drive into two partitions in the Windows 7 operating system. Windows 7 has an interesting utility called "Disk Management" that allows you to partition an HDD directly while the computer is running.
Why is partitioning an HDD necessary?
At least to protect files from loss. The fact is that when a computer gets infected with a virus, the OS gets damaged, which often causes it to stop loading.
So, during a Windows OS reinstallation, only the system partition will be formatted, typically the partition with the letter "C", but other partitions will not be formatted.
This allows you to keep important files safe and intact, even if the computer is infected with viruses.
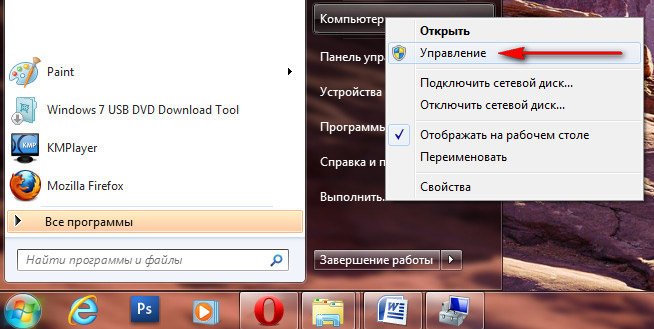
1) Launch "Computer Management". To do this, click on the "Start" menu, then right-click on "Computer" and select "Manage" from the context menu.
2) Select "Disk Management" from the left menu of the window that opens.
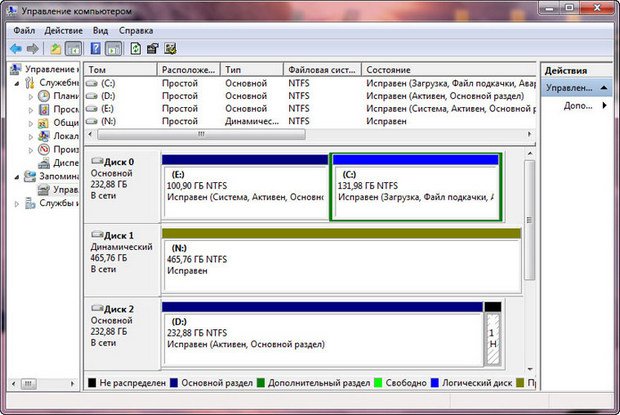
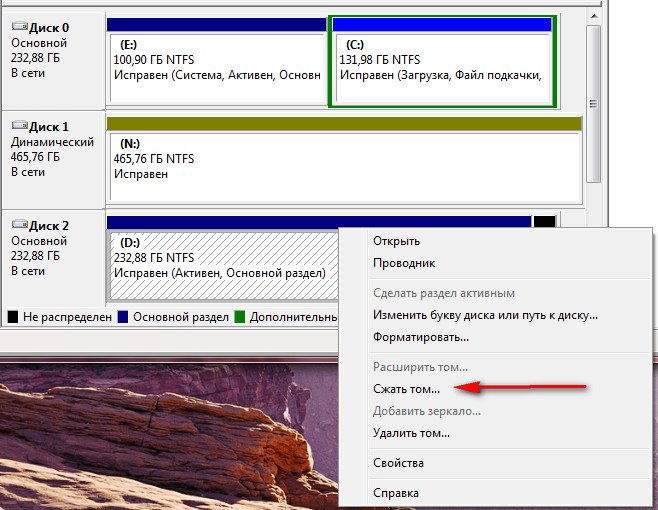
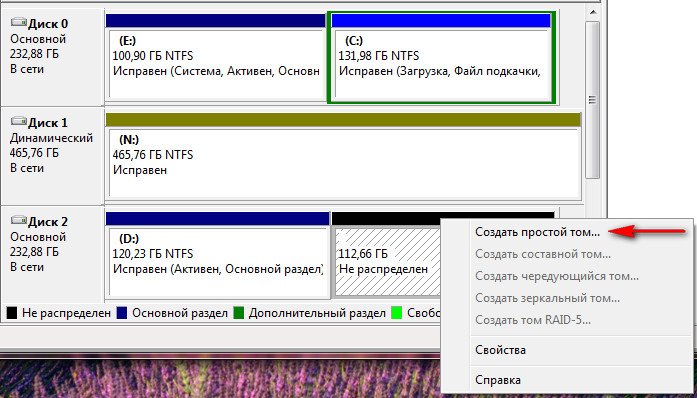
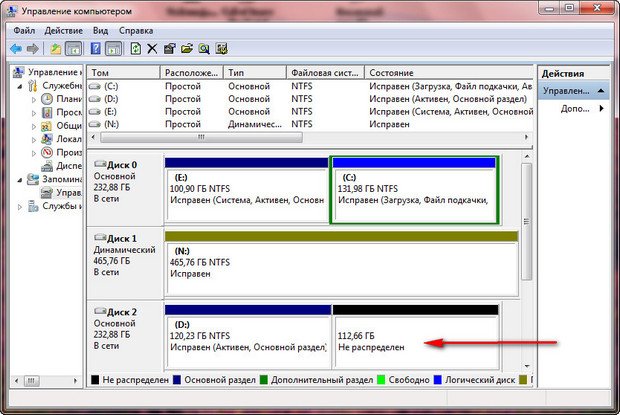
3) In this section, you can see all hard drives installed in the system. In this case, there are 3 HDDs connected to the computer. We will work with HDD #2, i.e., the third HDD - its size is 282GB.
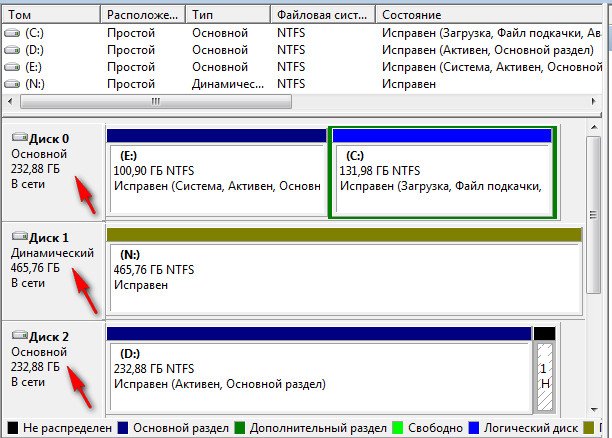
4) The HDD we are going to partition is not empty; it contains files. If you do everything correctly, the files will not disappear and everything will work fine.
5) Hover the mouse over the HDD you want to partition, right-click, and select "Shrink Volume".
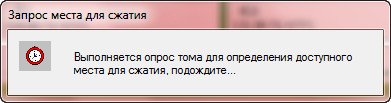
6) Wait 5-15 minutes while Windows determines the space on the disk that can be shrunk.
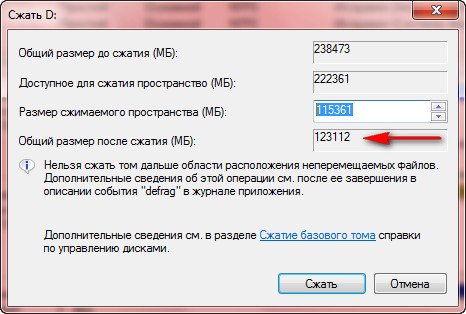
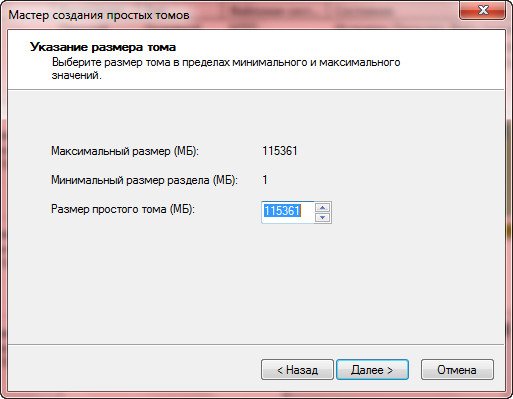
7) As a result, in the "Size of shrink space" field, a number appears - the maximum amount of space available for shrinking. And in the "Total size after shrink" field, the disk size after partitioning is displayed.
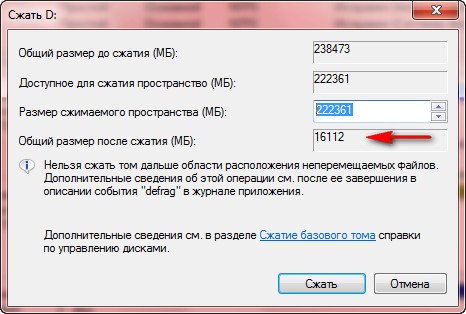
However, in our example, the size after shrinking is ~15GB, which is very small. Let's increase the size to ~120GB, which will be sufficient.
8) Click the "Shrink" button, after which no downloads will appear. Within approximately 5-10 minutes, unallocated space will appear on the HDD. Do not close the "Disk Management" window during this process.

10) Hover the mouse over the unallocated area of the HDD and right-click, then select "New Simple Volume".
11) The New Simple Volume wizard appears, click the "Next" button.

12) Click the "Next" button.
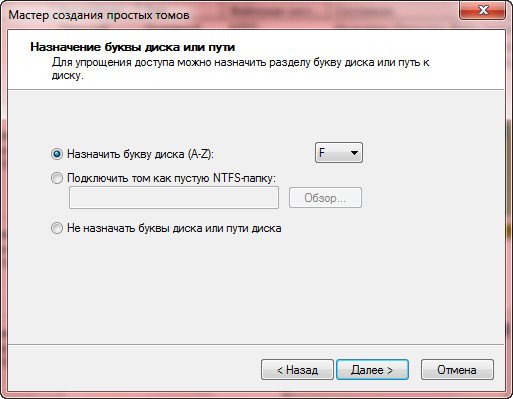
13) Assign any letter to the future disk and click the "Next" button.
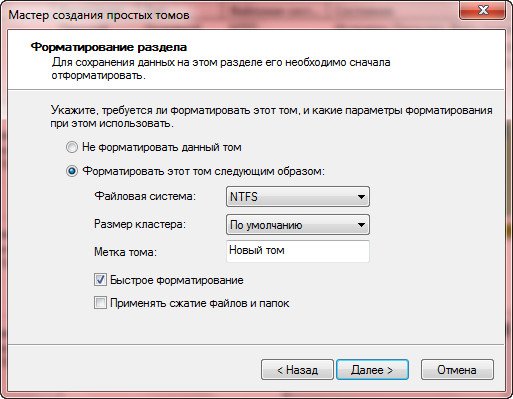
14) Specify the NTFS file system and click "Next".
15) Click the "Finish" button.
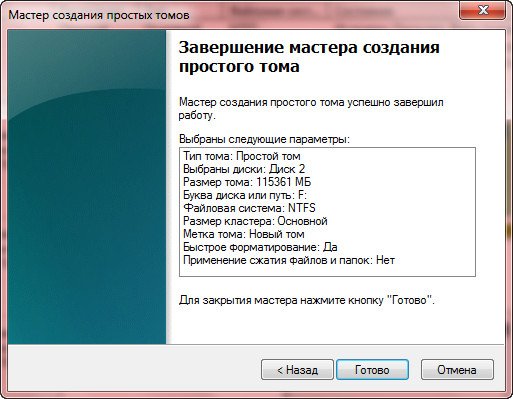
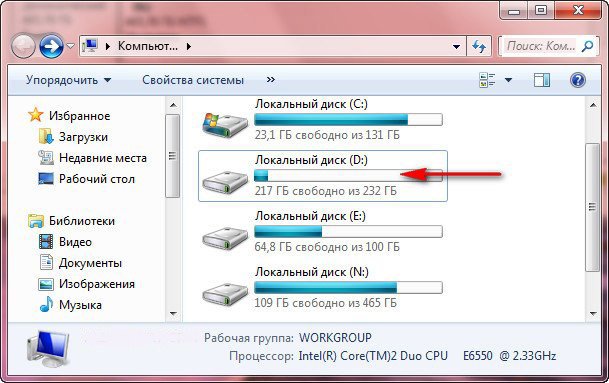
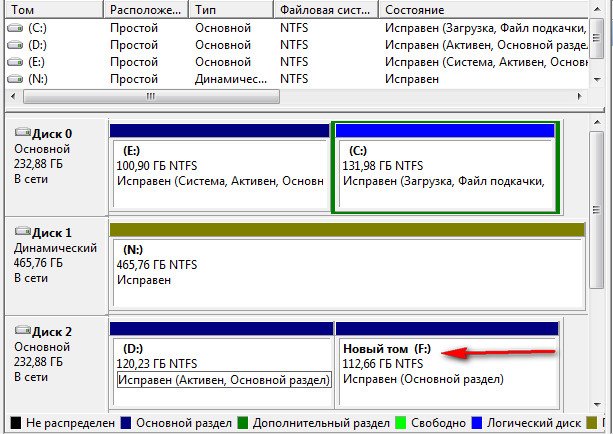
That's it, now you can see the new partition on the HDD in "Disk Management", which we just partitioned.
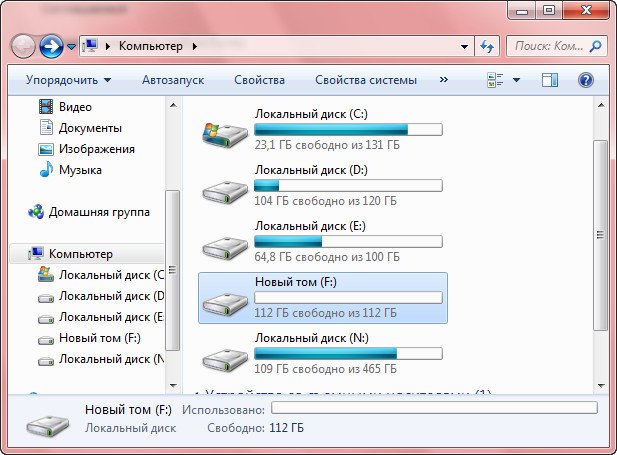
Also, the new partition is already available for use from File Explorer.
